LLaDA2-mini-preview is a diffusion-style Mixture-of-Experts (16B total, ~1.4B activated) instruction-tuned language model. It targets strong reasoning/coding while keeping inference light: only a small subset of experts fire per token, so you get near-7B quality with ~1–2B-class compute. It supports tool use, 4,096-token context, and works out-of-the-box with transformers via trust_remote_code. For best results, use diffusion sampling with temperature=0.0, steps=32, block_length=32.
| Benchmark | Ling-mini-2.0 | LLaDA-MoE-7B-A1B-Instruct | LLaDA2.0-mini-preview |
|---|
| Average | 60.67 | 52.39 | 58.71 |
| Knowledge | | | |
| MMLU | 78.75 | 67.18 | 72.49 |
| MMLU-PRO | 56.40 | 44.64 | 49.22 |
| GPQA | 37.99 | 31.09 | 31.82 |
| CMMLU | 77.84 | 64.30 | 67.53 |
| C-EVAL | 77.85 | 63.93 | 66.54 |
| Reasoning | | | |
| squad2.0 | 69.14 | 86.81 | 85.61 |
| drop | 76.35 | 79.77 | 79.49 |
| korbench | 51.04 | 38.40 | 37.26 |
| Coding | | | |
| CruxEval-O | 71.12 | 42.38 | 61.88 |
| mbpp | 81.03 | 70.02 | 77.75 |
| MultiPL-E | 62.23 | 52.53 | 62.43 |
| humaneval | 77.44 | 61.59 | 80.49 |
| livecodebench_v6 | 30.18 | 13.27 | 19.93 |
| Bigcodebench-Full | 35.88 | 20.44 | 30.44 |
| Math | | | |
| GSM8K | 91.58 | 82.41 | 89.01 |
| math | 82.22 | 58.68 | 73.50 |
| OlympiadBench | 49.93 | 21.04 | 36.67 |
| Agent & Alignment | | | |
| BFCL_Live | 45.74 | 63.09 | 74.11 |
| IFEval-strict -prompt | 69.13 | 59.33 | 62.50 |
| SyllogEval* | 33.28 | 64.22 | 47.34 |
| IXRB* | 19.00 | 15.00 | 27.00 |
GPU Configuration Table
| Setup | Precision / Quant | Min GPU VRAM | Good For | Suggested Max Context* | Notes |
|---|
| CPU only | FP16/BF16 (autocast) | — | Dev/tests, CI | 2k | Very slow; use small steps when prototyping. |
| 8–10 GB (e.g., RTX 3080 10G) | 4-bit (bnb/gguf-style)** | 8–10 GB | Single stream | 2k–3k | Heaviest savings; slight quality hit vs BF16. |
| 12 GB (RTX 3060 12G) | 8-bit (bitsandbytes) | 10–12 GB | Single stream | 3k–4k | Good balance of quality/VRAM; keep steps=32. |
| 16 GB (T4 16G / A5000 16G) | 8-bit or BF16 (tight) | 14–16 GB | 1–2 streams | 4k | BF16 may be tight; prefer 8-bit for headroom. |
| 20–24 GB (RTX 4090/6000 ADA) | BF16/FP16 | 18–22 GB | 2–4 streams | 4k | Smooth BF16, room for small batches. |
| 40 GB (A100 40G) | BF16 | 28–34 GB | 4–8 streams | 4k+ | Comfortable concurrency; larger beams OK. |
| 80 GB (A100/H100 80G) | BF16 | 40–55 GB | 8–16 streams | 4k+ | Highest throughput; long answers + batching. |
Resources
Link: https://huggingface.co/inclusionAI/LLaDA2.0-mini-preview
Step-by-Step Process to Install & Run LLaDA2.0-Mini-Preview Locally
For the purpose of this tutorial, we will use a GPU-powered Virtual Machine offered by NodeShift; however, you can replicate the same steps with any other cloud provider of your choice. NodeShift provides the most affordable Virtual Machines at a scale that meets GDPR, SOC2, and ISO27001 requirements.
Step 1: Sign Up and Set Up a NodeShift Cloud Account
Visit the NodeShift Platform and create an account. Once you’ve signed up, log into your account.
Follow the account setup process and provide the necessary details and information.

Step 2: Create a GPU Node (Virtual Machine)
GPU Nodes are NodeShift’s GPU Virtual Machines, on-demand resources equipped with diverse GPUs ranging from H200s to A100s. These GPU-powered VMs provide enhanced environmental control, allowing configuration adjustments for GPUs, CPUs, RAM, and Storage based on specific requirements.
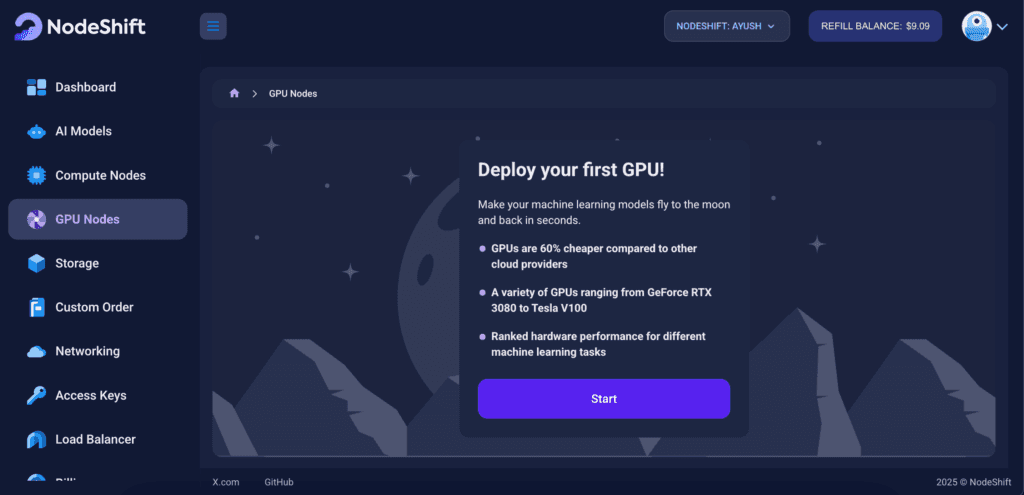
Navigate to the menu on the left side. Select the GPU Nodes option, create a GPU Node in the Dashboard, click the Create GPU Node button, and create your first Virtual Machine deploy
Step 3: Select a Model, Region, and Storage
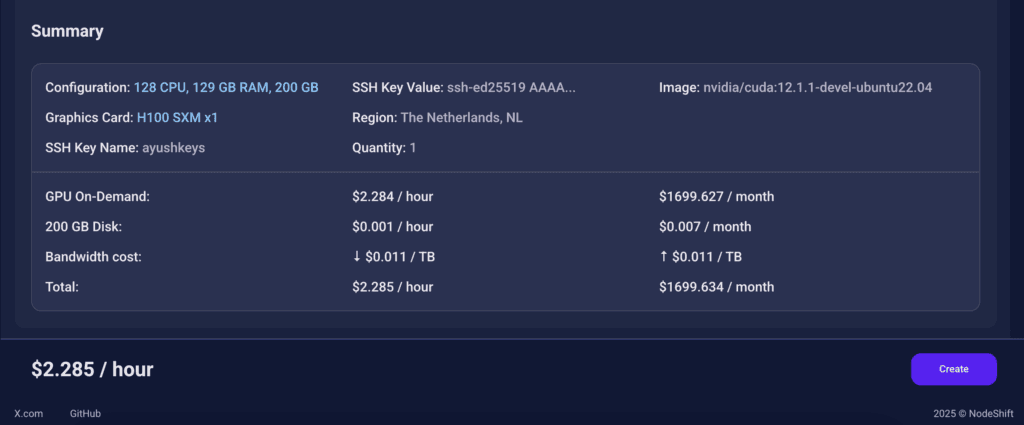
In the “GPU Nodes” tab, select a GPU Model and Storage according to your needs and the geographical region where you want to launch your model.
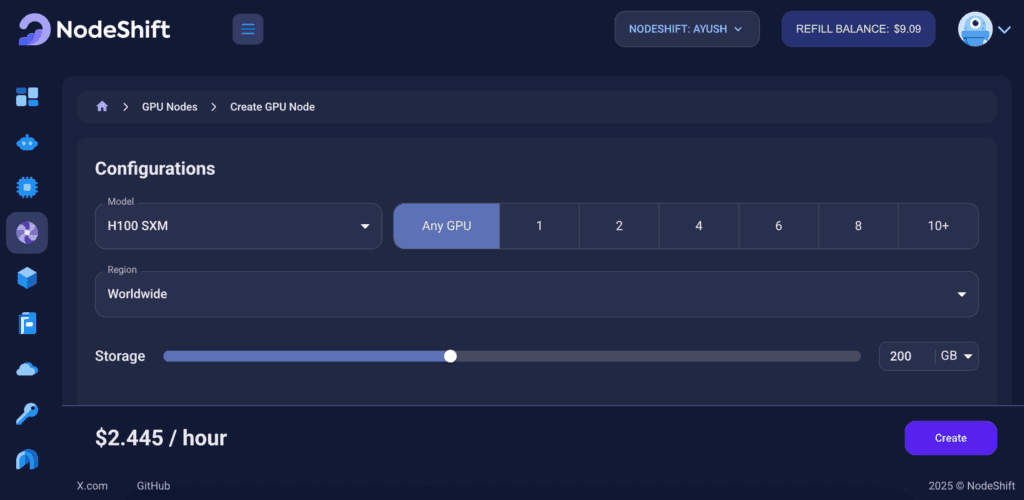
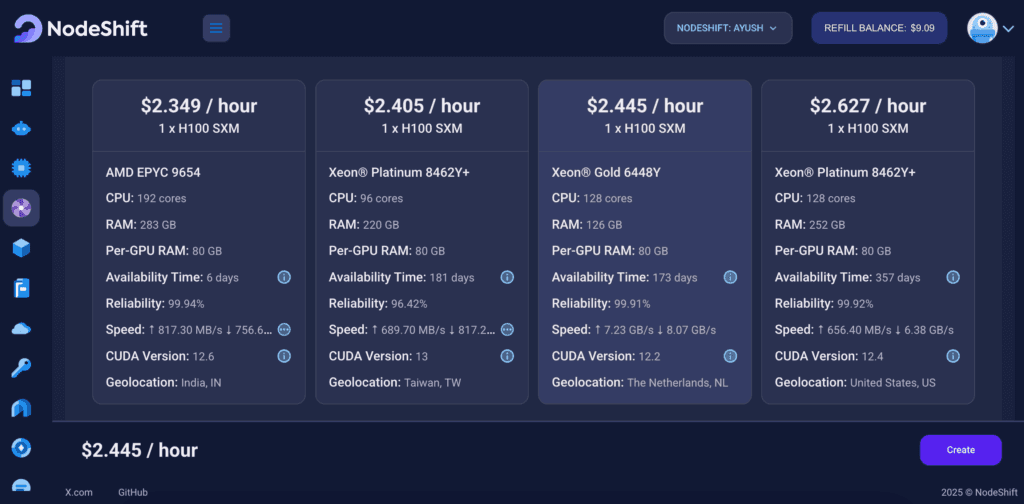
We will use 1 x H100 SXM GPU for this tutorial to achieve the fastest performance. However, you can choose a more affordable GPU with less VRAM if that better suits your requirements.
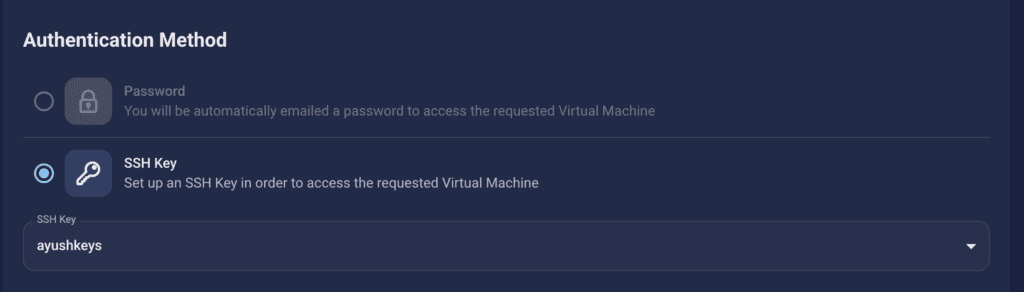
Step 4: Select Authentication Method
There are two authentication methods available: Password and SSH Key. SSH keys are a more secure option. To create them, please refer to our official documentation.
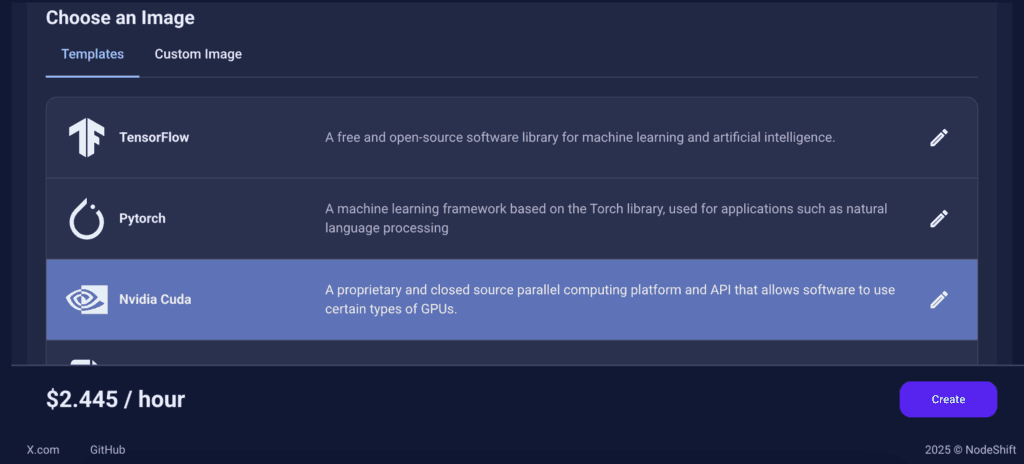
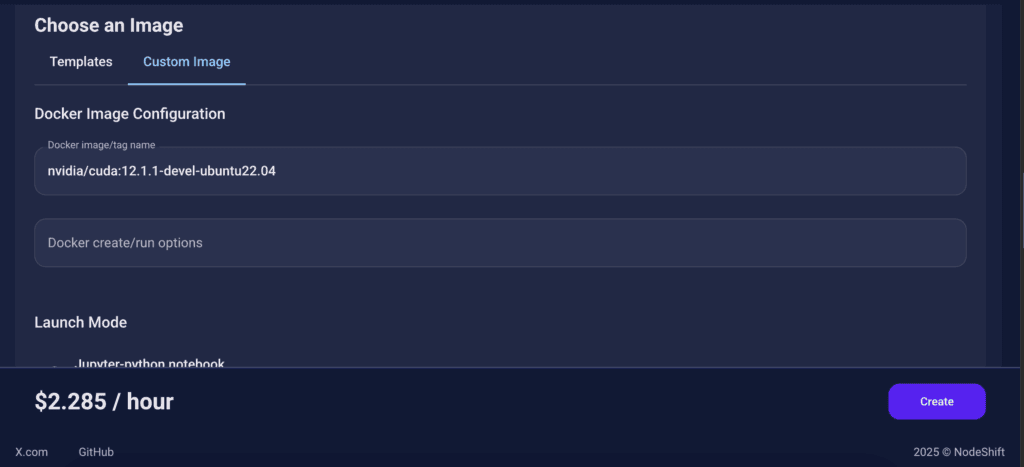
Step 5: Choose an Image
In our previous blogs, we used pre-built images from the Templates tab when creating a Virtual Machine. However, for running LLaDA2.0-Mini-Preview, we need a more customized environment with full CUDA development capabilities. That’s why, in this case, we switched to the Custom Image tab and selected a specific Docker image that meets all runtime and compatibility requirements.
We chose the following image:
nvidia/cuda:12.1.1-devel-ubuntu22.04
This image is essential because it includes:
- Full CUDA toolkit (including
nvcc)
- Proper support for building and running GPU-based models like LLaDA2.0-Mini-Preview.
- Compatibility with CUDA 12.1.1 required by certain model operations
Launch Mode
We selected:
Interactive shell server
This gives us SSH access and full control over terminal operations — perfect for installing dependencies, running benchmarks, and launching models like LLaDA2.0-Mini-Preview.
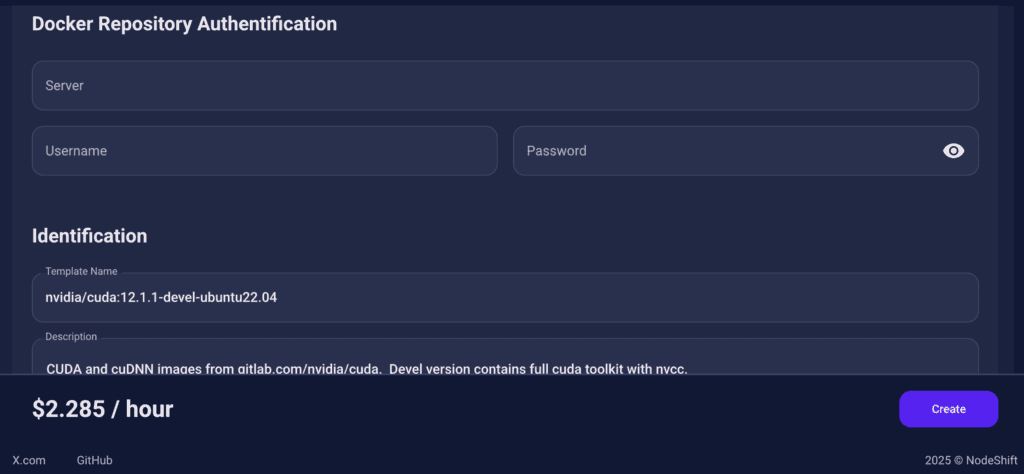
Docker Repository Authentication
We left all fields empty here.
Since the Docker image is publicly available on Docker Hub, no login credentials are required.
Identification
nvidia/cuda:12.1.1-devel-ubuntu22.04
CUDA and cuDNN images from gitlab.com/nvidia/cuda. Devel version contains full cuda toolkit with nvcc.
This setup ensures that the LLaDA2.0-Mini-Preview runs in a GPU-enabled environment with proper CUDA access and high compute performance.
After choosing the image, click the ‘Create’ button, and your Virtual Machine will be deployed.
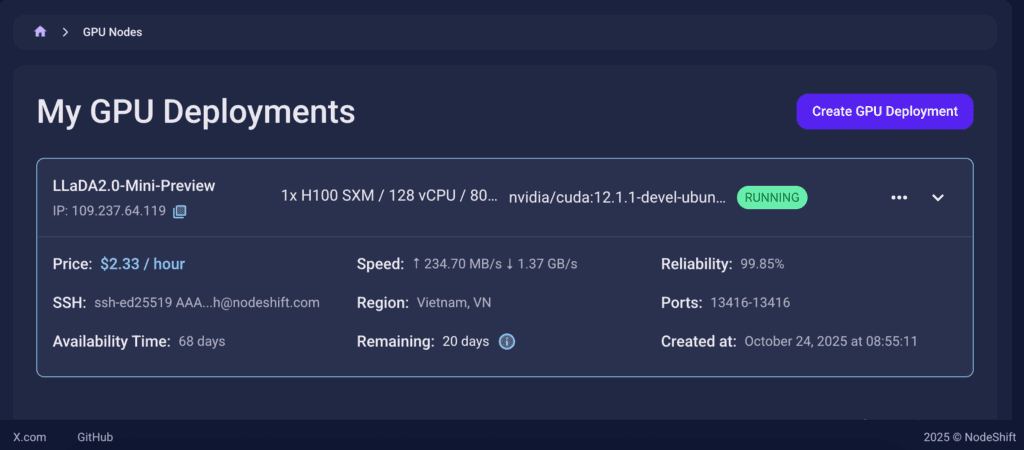
Step 6: Virtual Machine Successfully Deployed
You will get visual confirmation that your node is up and running.
Step 7: Connect to GPUs using SSH
NodeShift GPUs can be connected to and controlled through a terminal using the SSH key provided during GPU creation.
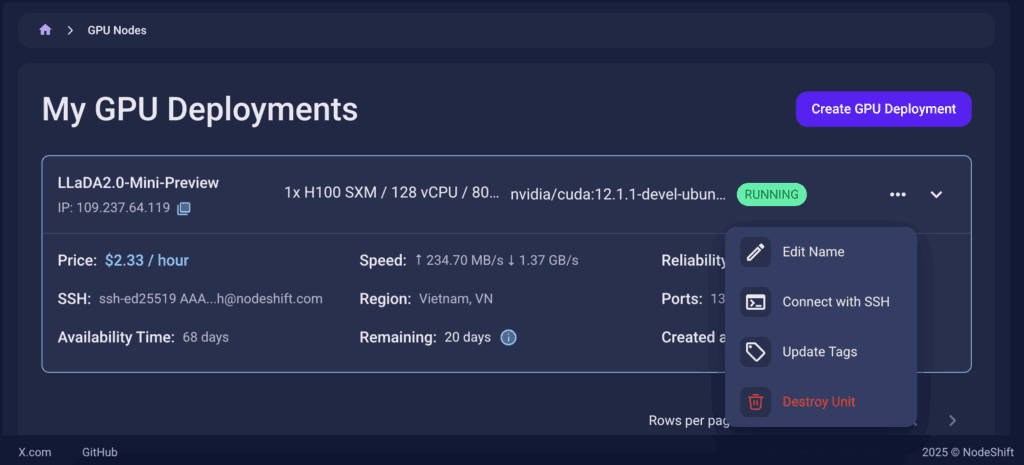
Once your GPU Node deployment is successfully created and has reached the ‘RUNNING’ status, you can navigate to the page of your GPU Deployment Instance. Then, click the ‘Connect’ button in the top right corner.
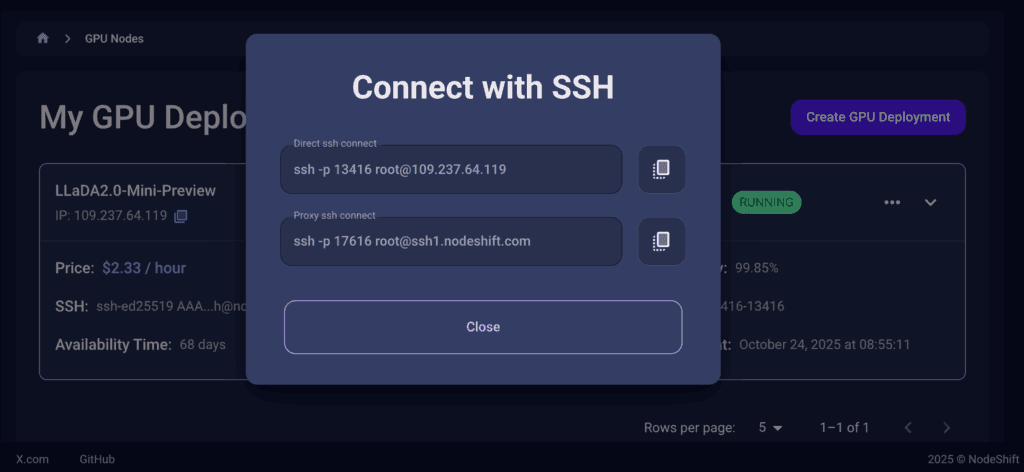
Now open your terminal and paste the proxy SSH IP or direct SSH IP.
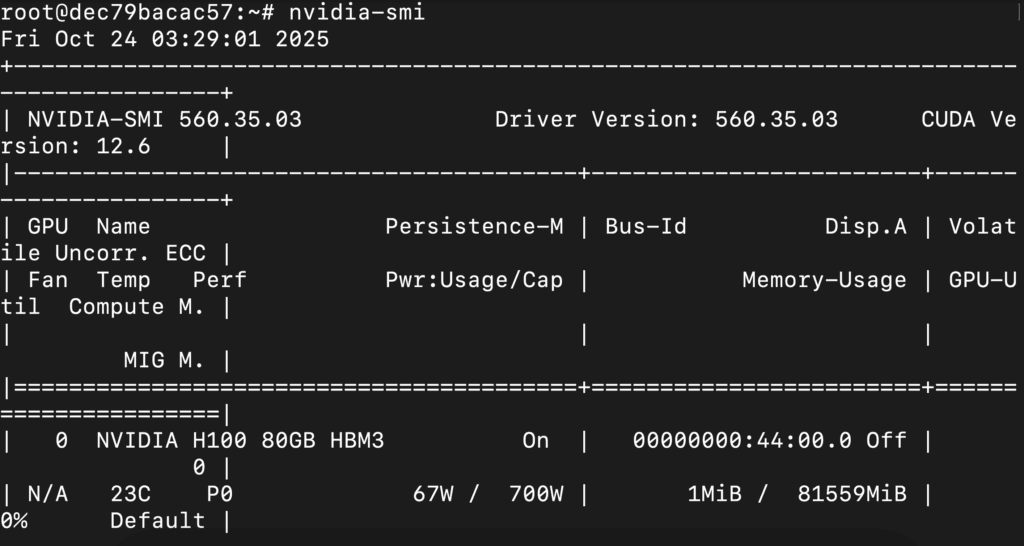
Next, If you want to check the GPU details, run the command below:
nvidia-smi
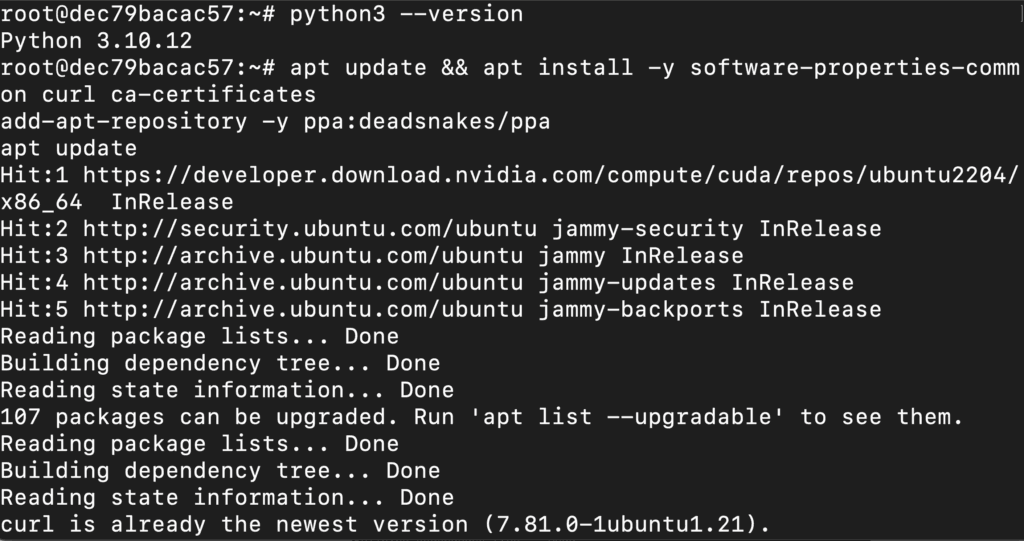
Step 8: Install Python 3.11 and Pip (VM already has Python 3.10; We Update It)
Run the following commands to check the available Python version.
If you check the version of the python, system has Python 3.10.12 available by default. To install a higher version of Python, you’ll need to use the deadsnakes PPA.
Run the following commands to add the deadsnakes PPA:
apt update && apt install -y software-properties-common curl ca-certificates
add-apt-repository -y ppa:deadsnakes/ppa
apt update
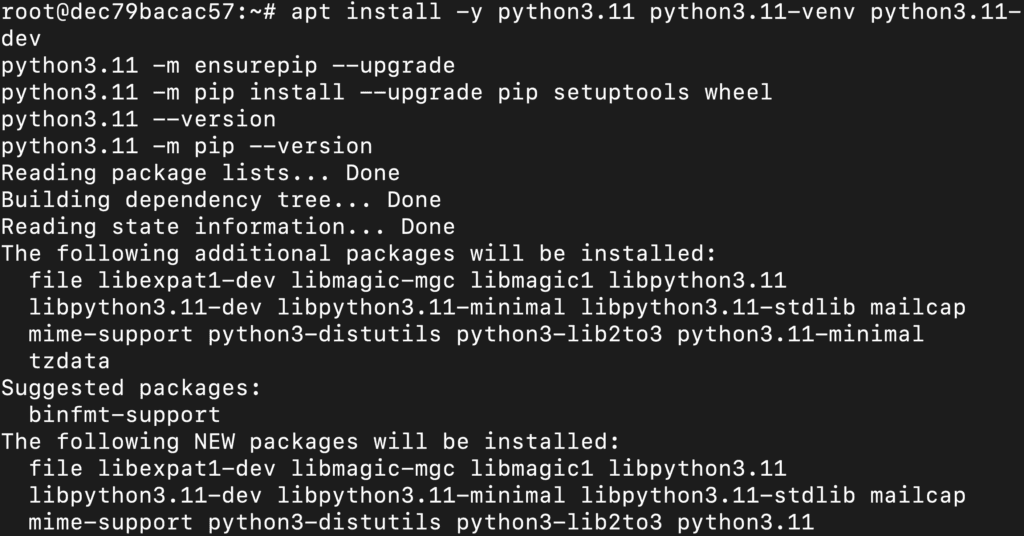
Now, run the following commands to install Python 3.11, Pip and Wheel:
apt install -y python3.11 python3.11-venv python3.11-dev
python3.11 -m ensurepip --upgrade
python3.11 -m pip install --upgrade pip setuptools wheel
python3.11 --version
python3.11 -m pip --version
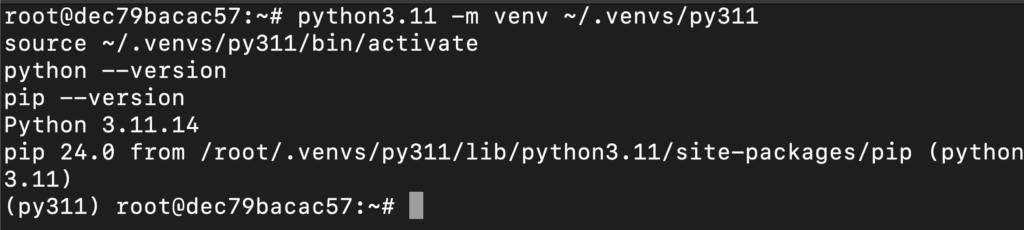
Step 9: Created and Activated Python 3.11 Virtual Environment
Run the following commands to created and activated Python 3.11 virtual environment:
python3.11 -m venv ~/.venvs/py311
source ~/.venvs/py311/bin/activate
python --version
pip --version
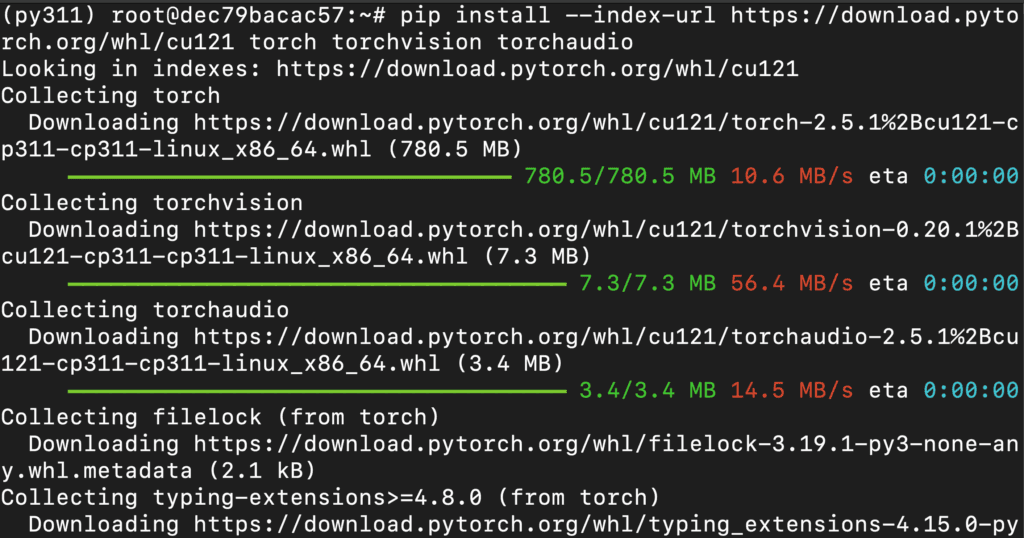
Step 10: Install PyTorch for CUDA
Run the following command to install PyTorch:
pip install --index-url https://download.pytorch.org/whl/cu121 torch torchvision torchaudio
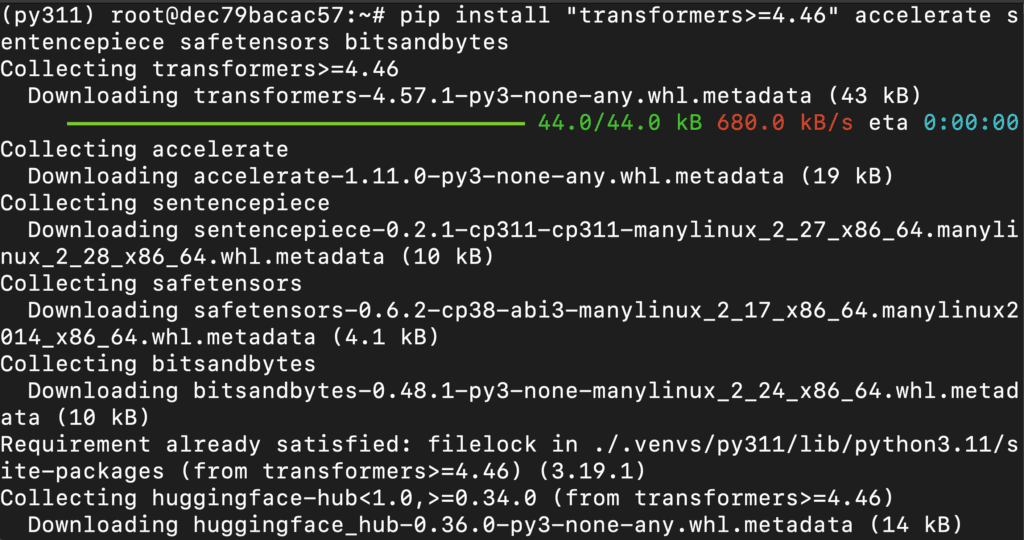
Step 11: Install the Utilities
Run the following command to install utilities:
pip install "transformers>=4.46" accelerate sentencepiece safetensors bitsandbytes
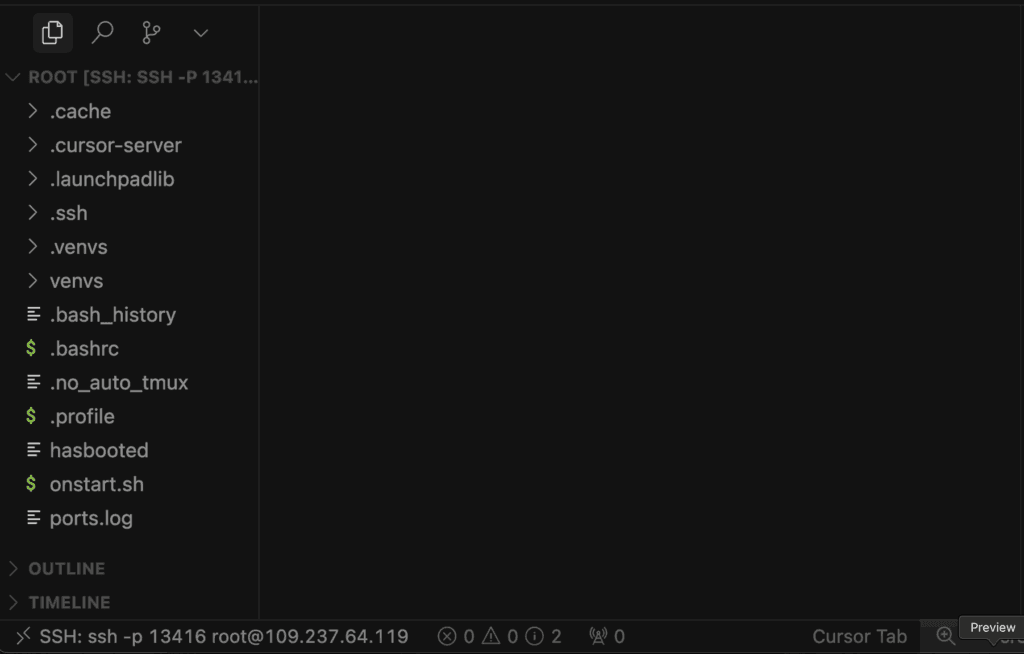
Step 12: Connect to Your GPU VM with a Code Editor
Before you start running model script with the LLaDA2.0-Mini-Preview model, it’s a good idea to connect your GPU virtual machine (VM) to a code editor of your choice. This makes writing, editing, and running code much easier.
- You can use popular editors like VS Code, Cursor, or any other IDE that supports SSH remote connections.
- In this example, we’re using cursor code editor.
- Once connected, you’ll be able to browse files, edit scripts, and run commands directly on your remote server, just like working locally.
Why do this?
Connecting your VM to a code editor gives you a powerful, streamlined workflow for Python development, allowing you to easily manage your code, install dependencies, and experiment with large models.
Step 13: Create the Script
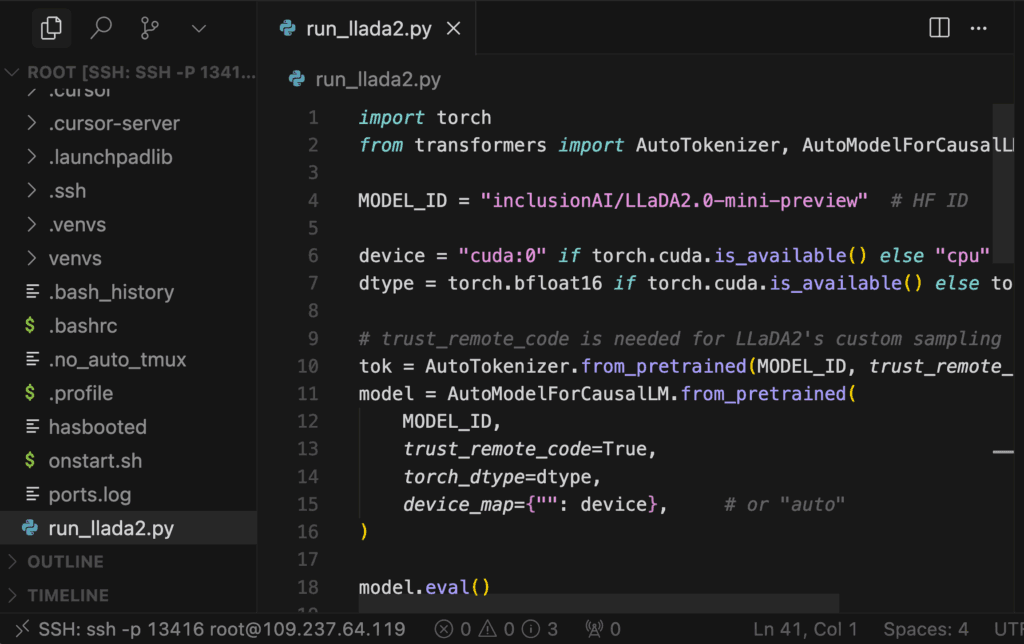
Create a file (ex: # run_llada2.py) and add the following code:
import torch
from transformers import AutoTokenizer, AutoModelForCausalLM
MODEL_ID = "inclusionAI/LLaDA2.0-mini-preview" # HF ID
device = "cuda:0" if torch.cuda.is_available() else "cpu"
dtype = torch.bfloat16 if torch.cuda.is_available() else torch.float32
# trust_remote_code is needed for LLaDA2's custom sampling
tok = AutoTokenizer.from_pretrained(MODEL_ID, trust_remote_code=True)
model = AutoModelForCausalLM.from_pretrained(
MODEL_ID,
trust_remote_code=True,
torch_dtype=dtype,
device_map={"": device}, # or "auto"
)
model.eval()
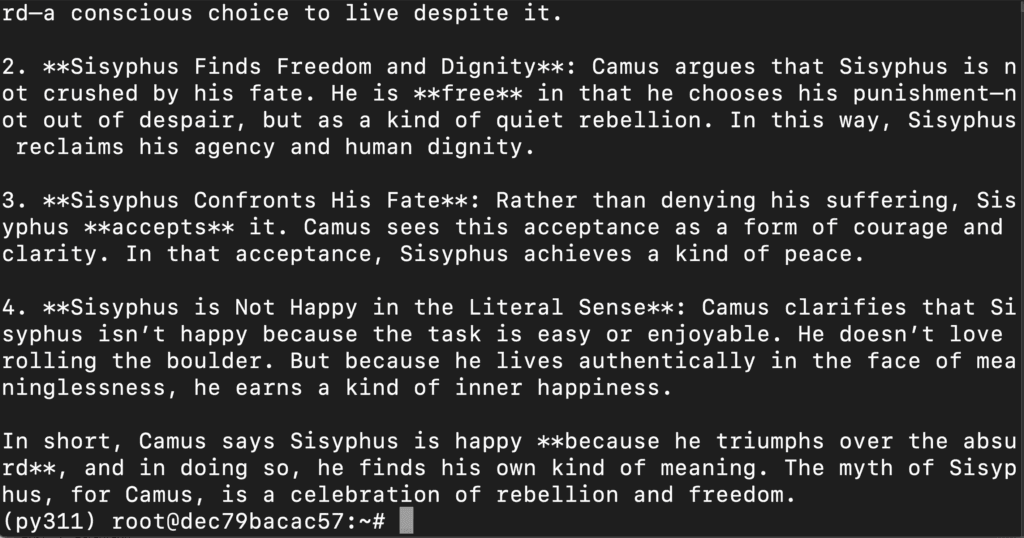
prompt = "Why does Camus think that Sisyphus is happy?"
chat = [{"role": "user", "content": prompt}]
inp = tok.apply_chat_template(
chat, add_generation_prompt=True, tokenize=True, return_tensors="pt"
).to(device)
with torch.inference_mode():
# Best-practice params from the model card (diffusion steps etc.)
out = model.generate(
inputs=inp,
eos_early_stop=True,
gen_length=512,
block_length=32,
steps=32,
temperature=0.0,
)
text = tok.decode(out[0], skip_special_tokens=True)
print("\n=== LLaDA2 response ===\n")
print(text)
What This Script Does
- Loads the LLaDA2.0-mini-preview model and tokenizer from Hugging Face with
trust_remote_code=True.
- Detects device (CUDA if available, else CPU) and uses bfloat16 on GPU (fallback to float32 on CPU).
- Wraps a user prompt in the model’s chat template to create input tensors.
- Calls the model’s native
generate() with diffusion-style params (gen_length=512, block_length=32, steps=32, temperature=0.0, eos_early_stop=True).
- Decodes and prints the model’s response to the terminal.
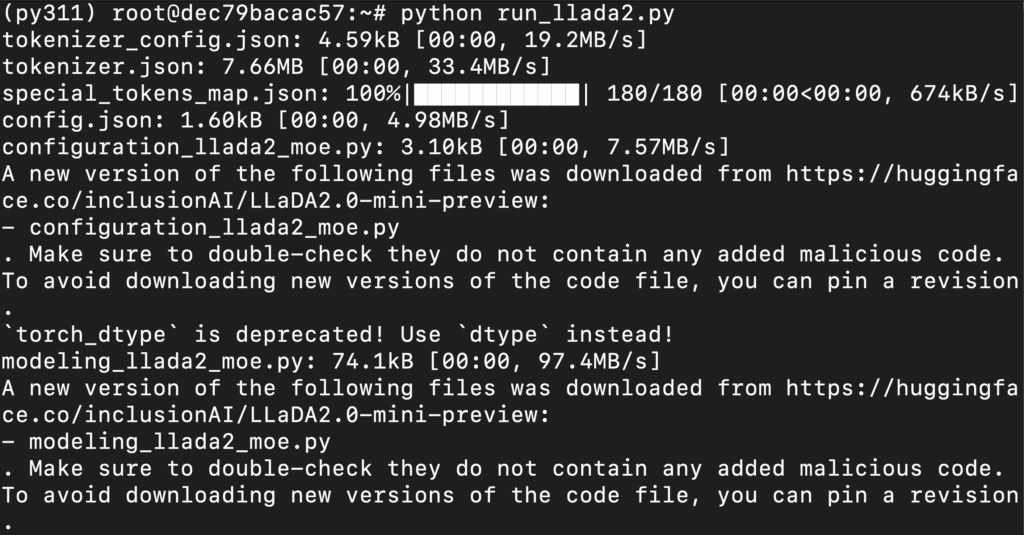
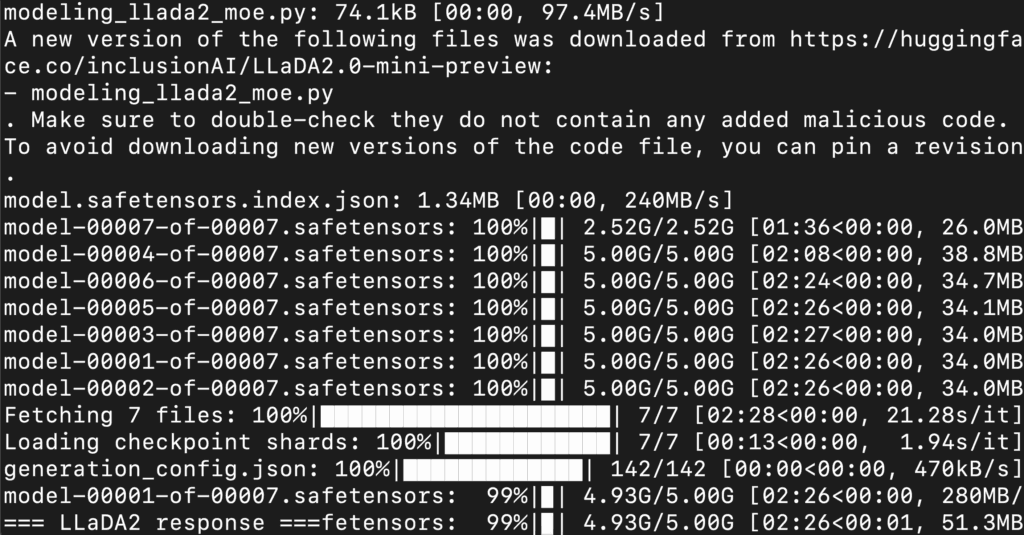
Step 14: Run the Script
Run the script from the following command:
python quickstart.py
This will load the model and generate the response on terminal.

Step 15: Install Dependencies
Run the following command to install dependencies:
pip install streamlit fastapi uvicorn
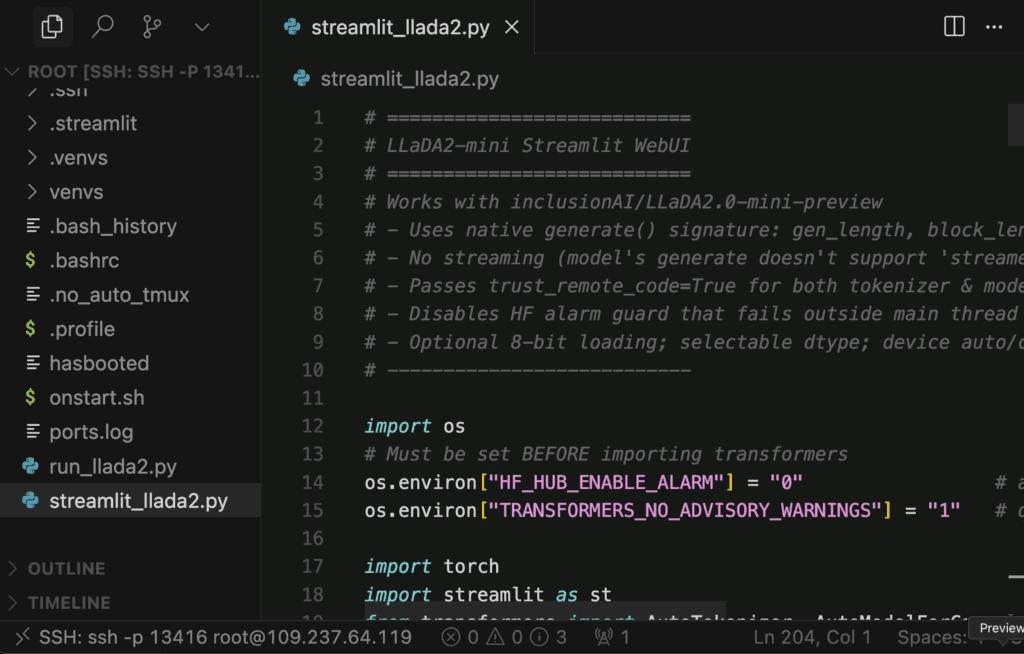
Step 16: Create the Script
Create a file (ex: # streamlit_llada2.py) and add the following code:
# ===========================
# LLaDA2-mini Streamlit WebUI
# ===========================
# Works with inclusionAI/LLaDA2.0-mini-preview
# - Uses native generate() signature: gen_length, block_length, steps, temperature, eos_early_stop
# - No streaming (model's generate doesn't support 'streamer' or 'max_new_tokens')
# - Passes trust_remote_code=True for both tokenizer & model
# - Disables HF alarm guard that fails outside main thread
# - Optional 8-bit loading; selectable dtype; device auto/cuda/cpu
# ---------------------------

import os
# Must be set BEFORE importing transformers
os.environ["HF_HUB_ENABLE_ALARM"] = "0"                 # avoid: "signal only works in main thread"
os.environ["TRANSFORMERS_NO_ADVISORY_WARNINGS"] = "1"   # quieter logs

import torch
import streamlit as st
from transformers import AutoTokenizer, AutoModelForCausalLM

st.set_page_config(page_title="LLaDA2-mini WebUI", page_icon="🤖", layout="wide")

# ---------- SIDEBAR ----------
with st.sidebar:
    st.title("⚙️ Settings")

    MODEL_ID = st.text_input(
        "Model (HF id or local path)",
        value="inclusionAI/LLaDA2.0-mini-preview",
    )

    dtype_choice = st.selectbox("dtype", ["bfloat16", "float16", "float32"], index=0)
    load_8bit = st.checkbox("Load in 8-bit (bitsandbytes)", value=False)
    device_choice = st.selectbox("Device", ["auto (recommended)", "cuda:0", "cpu"], index=0)

    st.markdown("---")
    st.subheader("Decoding / Diffusion (native)")
    temperature = st.slider("temperature", 0.0, 1.0, 0.0, 0.01)
    steps = st.slider("steps", 1, 128, 32, 1)
    block_length = st.slider("block_length", 4, 256, 32, 1)
    gen_length = st.slider("gen_length (max output tokens)", 64, 4096, 512, 64)

    st.markdown("---")
    system_prompt = st.text_area(
        "System prompt (optional)",
        value="You are LLaDA2-mini, a helpful, precise assistant.",
        height=80,
    )

    if st.button("🧹 Clear chat"):
        st.session_state.messages = []

# ---------- SESSION STATE ----------
if "messages" not in st.session_state:
    st.session_state.messages = []

if "tok" not in st.session_state:
    st.session_state.tok = None
if "model" not in st.session_state:
    st.session_state.model = None
if "loaded_model_id" not in st.session_state:
    st.session_state.loaded_model_id = None
if "loaded_config" not in st.session_state:
    st.session_state.loaded_config = {}

def _dtype_from_choice(name: str):
    return {
        "bfloat16": torch.bfloat16,
        "float16": torch.float16,
        "float32": torch.float32,
    }[name]

def _device_map_from_choice(choice: str):
    if choice.startswith("auto"):
        return "auto"
    elif choice.startswith("cuda"):
        return {"": choice}
    else:
        return {"": "cpu"}

def need_reload():
    cfg = {
        "MODEL_ID": MODEL_ID,
        "dtype": dtype_choice,
        "load_8bit": load_8bit,
        "device_choice": device_choice,
    }
    return (
        st.session_state.tok is None
        or st.session_state.model is None
        or st.session_state.loaded_model_id != MODEL_ID
        or st.session_state.loaded_config != cfg
    )

@st.cache_resource(show_spinner=True)
def load_model_cached(model_id, dtype_name, load_8bit, device_choice):
    torch_dtype = _dtype_from_choice(dtype_name)
    device_map = _device_map_from_choice(device_choice)

    # Always trust repo code for LLaDA2
    tok = AutoTokenizer.from_pretrained(model_id, trust_remote_code=True)

    if load_8bit:
        model = AutoModelForCausalLM.from_pretrained(
            model_id,
            trust_remote_code=True,
            load_in_8bit=True,
            device_map=device_map,
        )
    else:
        # Prefer new 'dtype' kwarg; fall back to 'torch_dtype' if needed
        try:
            model = AutoModelForCausalLM.from_pretrained(
                model_id,
                trust_remote_code=True,
                dtype=torch_dtype,      # new name
                device_map=device_map,
            )
        except TypeError:
            model = AutoModelForCausalLM.from_pretrained(
                model_id,
                trust_remote_code=True,
                torch_dtype=torch_dtype,  # legacy name
                device_map=device_map,
            )

    return tok, model.eval()

# ---------- HEADER ----------
st.markdown(
    "<div style='padding: 8px; background: #111; color:#fff; border-radius:10px;'>"
    "<b>LLaDA2.0-mini-preview</b> • Diffusion MoE WebUI (native generate)</div>",
    unsafe_allow_html=True,
)
st.write("")

# ---------- LOAD (once per setting change) ----------
if need_reload():
    with st.spinner("Loading model… (first run can take a bit)"):
        tok, model = load_model_cached(MODEL_ID, dtype_choice, load_8bit, device_choice)
    st.session_state.tok = tok
    st.session_state.model = model
    st.session_state.loaded_model_id = MODEL_ID
    st.session_state.loaded_config = {
        "MODEL_ID": MODEL_ID,
        "dtype": dtype_choice,
        "load_8bit": load_8bit,
        "device_choice": device_choice,
    }

tok = st.session_state.tok
model = st.session_state.model

# ---------- HISTORY ----------
for m in st.session_state.messages:
    with st.chat_message(m["role"]):
        st.markdown(m["content"])

# ---------- CHAT ----------
user_msg = st.chat_input("Type your message…")
if user_msg:
    st.session_state.messages.append({"role": "user", "content": user_msg})
    with st.chat_message("user"):
        st.markdown(user_msg)

    # conversation (include system prompt if provided)
    conv = []
    if system_prompt.strip():
        conv.append({"role": "system", "content": system_prompt.strip()})
    conv.extend(st.session_state.messages)

    try:
        # Build input IDs via chat template
        input_ids = tok.apply_chat_template(
            conv,
            add_generation_prompt=True,
            tokenize=True,
            return_tensors="pt",
        )
        dev = next(model.parameters()).device
        input_ids = input_ids.to(dev)

        # IMPORTANT: use LLaDA2's native generate signature ONLY
        with torch.inference_mode():
            out = model.generate(
                inputs=input_ids,
                eos_early_stop=True,
                gen_length=int(gen_length),
                block_length=int(block_length),
                steps=int(steps),
                temperature=float(temperature),
            )

        text = tok.decode(out[0], skip_special_tokens=True)

        with st.chat_message("assistant"):
            st.markdown(text)

        st.session_state.messages.append({"role": "assistant", "content": text})

    except Exception as e:
        with st.chat_message("assistant"):
            st.markdown(f"**Error:** {type(e).__name__}: {e}")
What This Script Does
- Sets up a Streamlit web app with a chat UI to talk to LLaDA2.0-mini-preview.
- Loads tokenizer & model with
trust_remote_code=True, supports BF16/FP16/FP32 or 8-bit and auto/cuda/cpu device maps.
- Provides a sidebar to tweak temperature, steps, block_length, gen_length, model/dtype/device, and to clear chat.
- Builds inputs via the model’s chat template and calls the native
generate() (no streaming) with those diffusion params.
- Maintains conversation history in
st.session_state and renders user/assistant messages on the page.
Step 17: Launch the Streamlit UI
Run Streamlit:
streamlit run streamlit_llada2.py --server.port 8501 --server.address 0.0.0.0
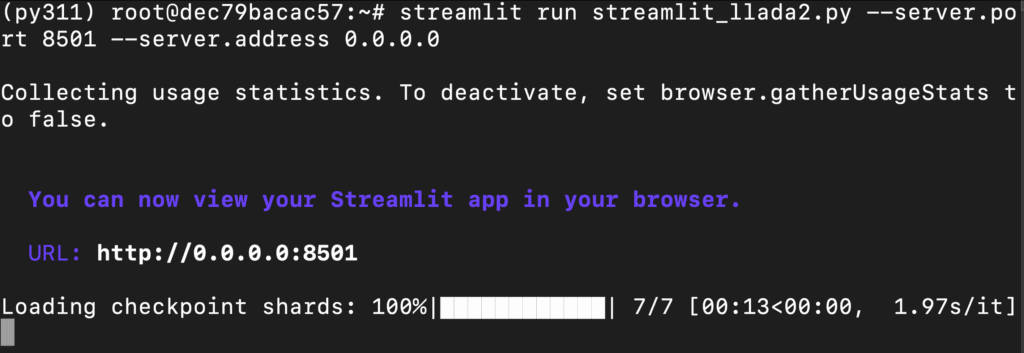
Step 18: Access the Streamlit App
Access the streamlit app on:
http://0.0.0.0:8501/
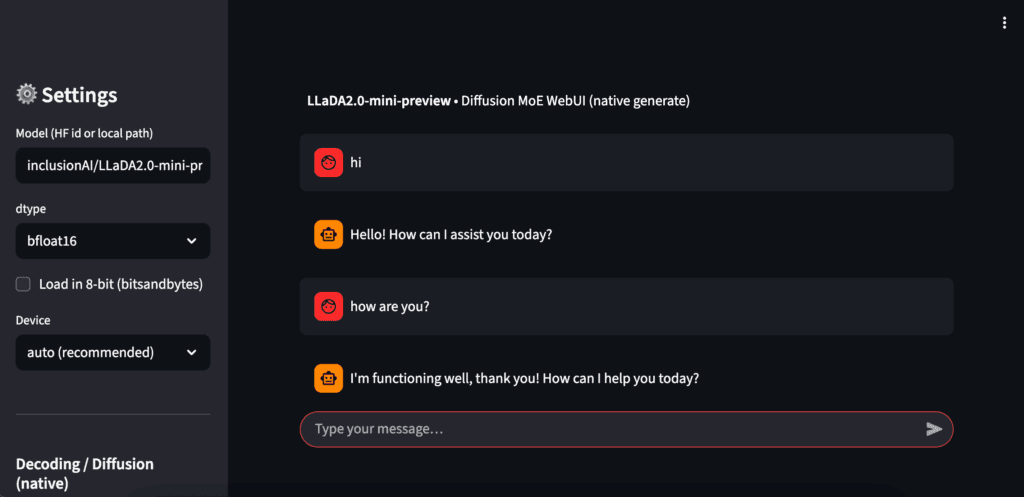
Play with Model
Conclusion
LLaDA2.0-Mini-Preview brings a refreshing twist to the open-source landscape — blending diffusion-style sampling with a Mixture-of-Experts backbone to deliver near-7B performance at a fraction of the compute. With its lightweight 1.4B active parameters, 4K context, and strong reasoning-plus-coding balance, it’s an excellent choice for developers who want power without the price tag.
Whether you’re running it on a NodeShift GPU VM or your own setup, LLaDA2-Mini makes high-quality inference, experimentation, and even web-based interaction through Streamlit smooth and accessible. It’s a model built not just for benchmarks, but for practical, everyday intelligence at scale.


