Managing Kubernetes often feels like learning a whole new programming language – powerful yet dense with commands, flags, and configurations that can overwhelm even experienced DevOps teams. kubectl-ai bridges this complexity with the intelligence of large language models (LLMs), acting as a natural language interface for your cluster. Instead of memorizing verbose kubectl commands, you can simply ask, “how’s my nginx app doing in the cluster?” and kubectl-ai translates that into the exact Kubernetes operations needed. It supports a wide range of AI providers, from Google’s Gemini and VertexAI to OpenAI, Grok, Bedrock, and even local models with Ollama and llama.cpp, giving you flexibility to run it in the cloud or fully offline. With features like interactive chat sessions, persistent context between queries, custom tool integration, and seamless configuration options, kubectl-ai doesn’t just execute commands, it helps you understand, debug, and manage your workloads with ease.
In this article, we’ll see step-by-step process to install, setup and use kubectl-ai and make dealing with Kubernetes smarter, friendlier, and far more accessible.
Prerequisites
The minimum system requirements for running this model are:
- CPUs: 4, GPU: 1x RTXA6000
- Storage: 50 GB (preferable)
- RAM: at least 48 GB
Step-by-step process to install kubectl-ai
For this tutorial, we’ll use a CPU-powered Virtual Machine by NodeShift, which provides high-compute Virtual Machines at a very affordable cost on a scale that meets GDPR, SOC2, and ISO27001 requirements. It also offers an intuitive and user-friendly interface, making it easier for beginners to get started with Cloud deployments. However, feel free to use any cloud provider you choose and follow the same steps for the rest of the tutorial.
Step 1: Setting up a NodeShift Account
Visit app.nodeshift.com and create an account by filling in basic details, or continue signing up with your Google/GitHub account.
If you already have an account, login straight to your dashboard.

Step 2: Create a Compute Node (CPU Virtual Machine)
After accessing your account, you should see a dashboard (see image), now:
- Navigate to the menu on the left side.
- Click on the Compute Nodes option.

- Click on Start to start creating your very first compute node.

These Compute nodes are CPU-powered virtual machines by NodeShift. These nodes are highly customizable and let you control different environmental configurations, such as vCPUs, RAM, and storage, according to your needs.
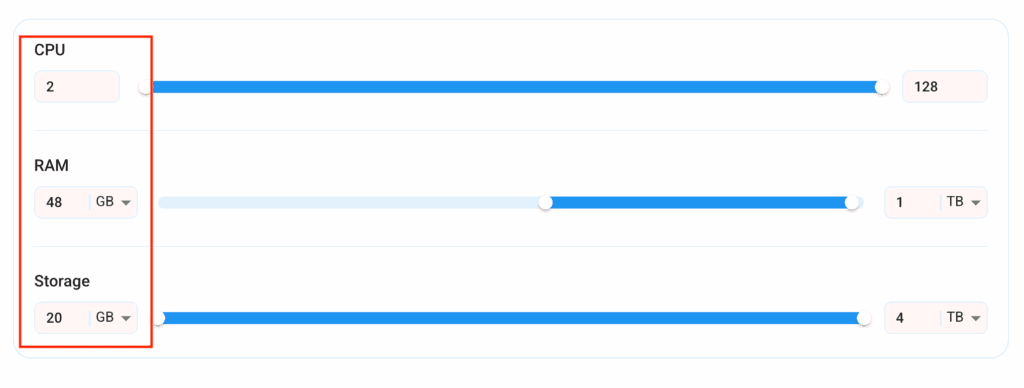
Step 3: Select configuration for VM
- The first option you see is the Reliability dropdown. This option lets you choose the uptime guarantee level you seek for your VM (e.g., 99.9%).

- Next, select a geographical region from the Region dropdown where you want to launch your VM (e.g., United States).

- Most importantly, select the correct specifications for your VM according to your workload requirements by sliding the bars for each option.
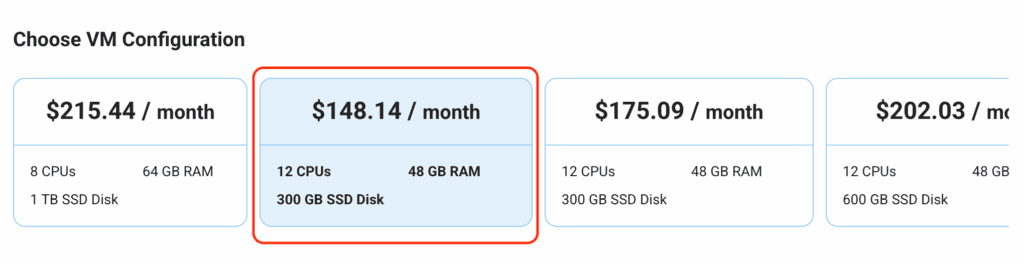
Step 4: Choose VM Configuration and Image
- After selecting your required configuration options, you’ll see the available VMs in your region and as per (or very close to) your configuration. In our case, we’ll choose a ‘4vCPUs/8GB/160GB SSD’ as the closest match to the “Prerequisites”.
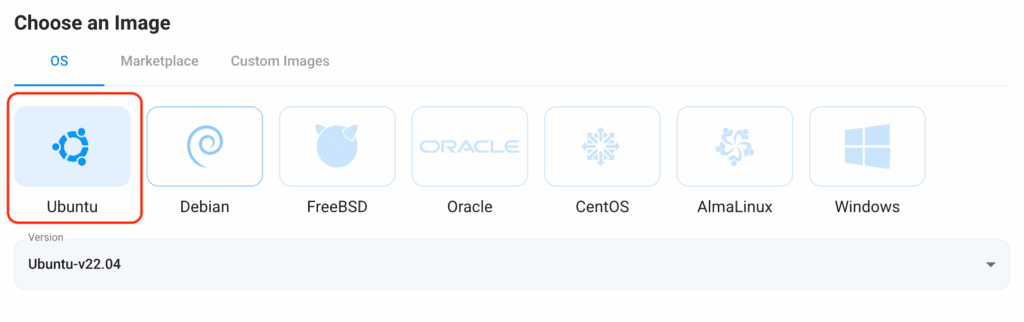
- Next, you’ll need to choose an image for your Virtual Machine. For the scope of this tutorial, we’ll select Ubuntu, as we will install Graylog on the Ubuntu server.
Step 5: Choose the Billing cycle and Authentication Method
- Two billing cycle options are available: Hourly, ideal for short-term usage, offering pay-as-you-go flexibility, and Monthly for long-term projects with a consistent usage rate and potentially lower cost.

- Next, you’ll need to select an authentication method. Two methods are available: Password and SSH Key. We recommend using SSH keys, as they are a more secure option. To create one, head over to our official documentation.

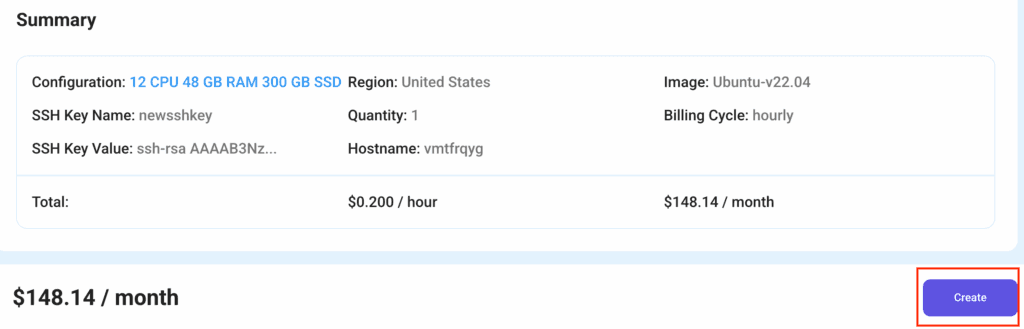
Step 6: Finalize Details and Create Deployment
Finally, you can also add a VPC (Virtual Private Cloud), which provides an isolated section to launch your cloud resources (Virtual machine, storage, etc.) in a secure, private environment. We’re keeping this option as the default for now, but feel free to create a VPC according to your needs.
Also, you can deploy multiple nodes at once using the Quantity option.

That’s it! You are now ready to deploy the node. Finalize the configuration summary; if it looks good, go ahead and click Create to deploy the node.
Step 7: Connect to active Compute Node using SSH
As soon as you create the node, it will be deployed in a few seconds or a minute. Once deployed, you will see a status Running in green, meaning that our Compute node is ready to use!
Once your node shows this status, follow the below steps to connect to the running VM via SSH:
- Open your terminal and run the below SSH command:
(replace root with your username and paste the IP of your VM in place of ip after copying it from the dashboard)
ssh root@ip
2. In some cases, your terminal may take your consent before connecting. Enter ‘yes’.
3. A prompt will request a password. Type the SSH password, and you should be connected.
Output:

Step 8: Setup GPT-OSS with Ollama
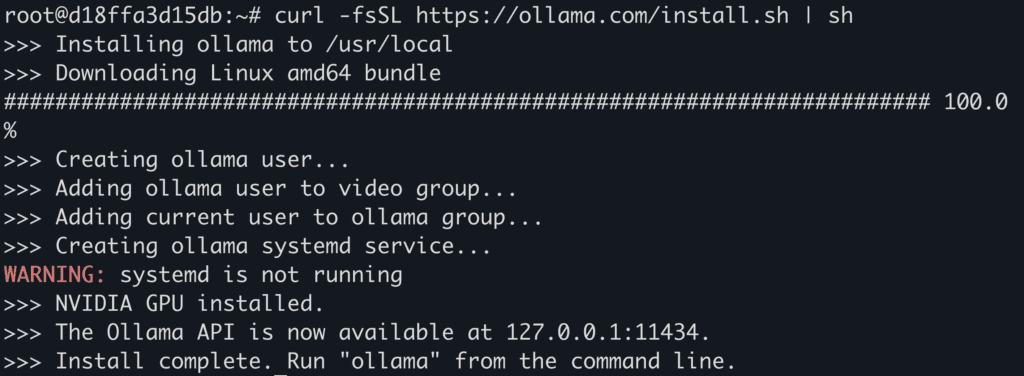
- Install Ollama with dependencies.
apt update
apt install pciutils lshw
curl -fsSL https://ollama.com/install.sh | sh
Output:
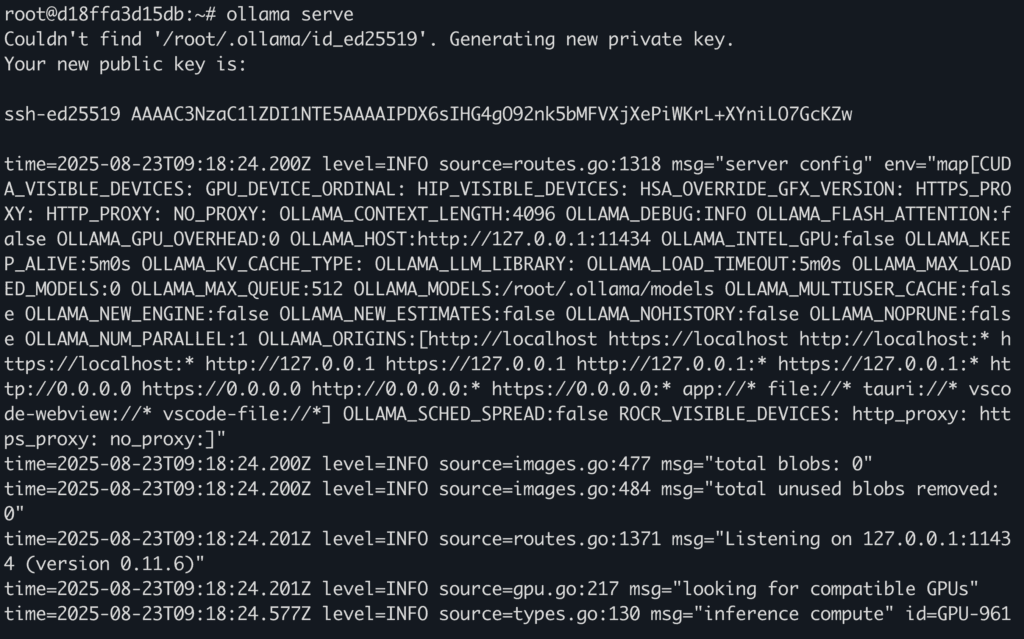
2. Start Ollama server if it’s already not running by default.
ollama serve
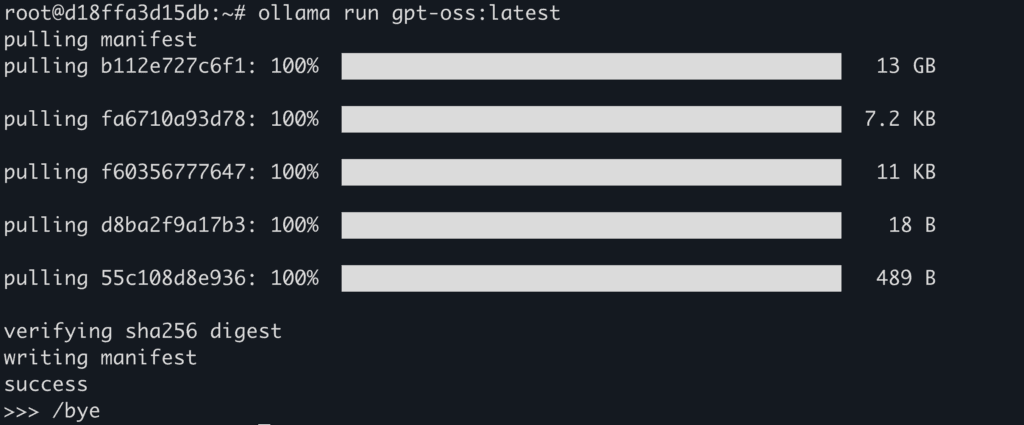
3. Download gpt-oss using ollama.
ollama run gpt-oss:latest
Output:
Step 9: Install Kubectl-ai
- Before installing
kubectl-ai ensure you’ve the following packages installed in the system:
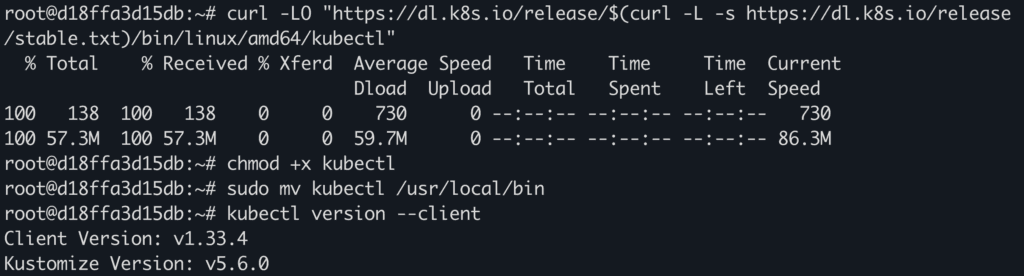
– kubectl
– docker: see installation guide here
– minikube: see installation guide here
Output:
2. Install kubectl-ai.
We’re installing v0.0.14 as this is the most latest bug-free version that works. You can try newer versions, but they might not work as expected.
curl -LO https://github.com/GoogleCloudPlatform/kubectl-ai/releases/download/v0.0.14/kubectl-ai_Darwin_arm64.tar.gz
tar -xzf kubectl-ai_Darwin_arm64.tar.gz
sudo mv kubectl-ai /usr/local/bin/
Output:

3. Once installed, confirm version.
kubectl-ai version
Step 10: Create Kubernetes Pods for Testing
Now before we move on to test the AI tool, we’ll first create some Kubernetes test pods using minikube.
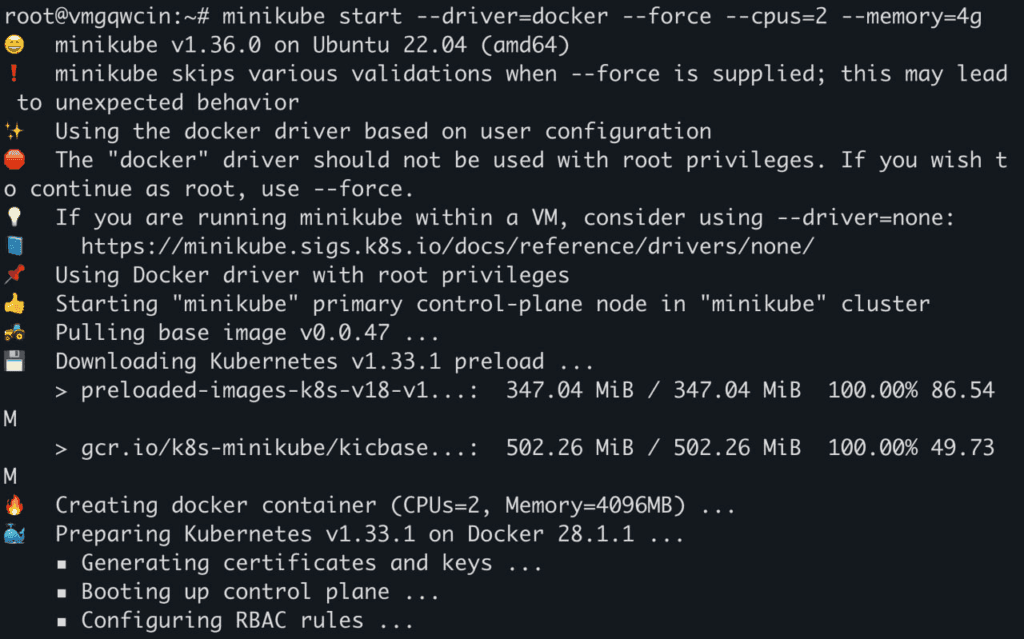
- First start a kubernetes node.
minikube start --driver=docker --force --cpus=2 --memory=4g
Output:
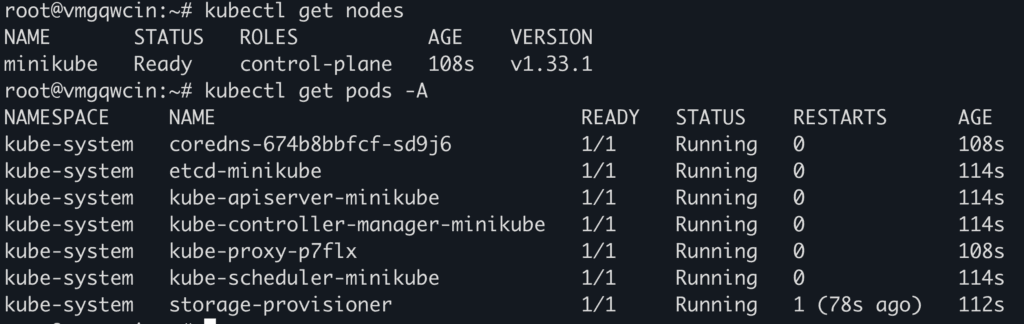
2. Confirm nodes are created.
kubectl get nodes
Output:
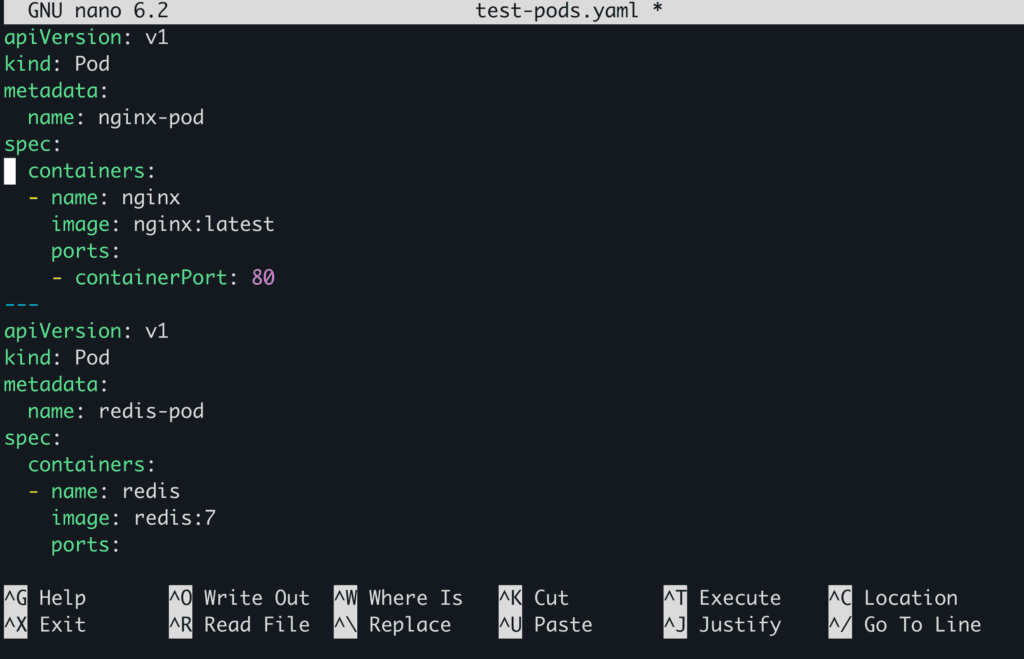
3. Create YAML config file.
touch test-pods.yaml
nano test-pods.yaml
4. Paste the following config in the file.
apiVersion: v1
kind: Pod
metadata:
  name: nginx-pod
spec:
  containers:
  - name: nginx
    image: nginx:latest
    ports:
    - containerPort: 80
---
apiVersion: v1
kind: Pod
metadata:
  name: redis-pod
spec:
  containers:
  - name: redis
    image: redis:7
    ports:
    - containerPort: 6379
---
apiVersion: v1
kind: Pod
metadata:
  name: busybox-pod
spec:
  containers:
  - name: busybox
    image: busybox
    command: ['sh', '-c', 'while true; do echo Hello from BusyBox; sleep 5; done']
Output:
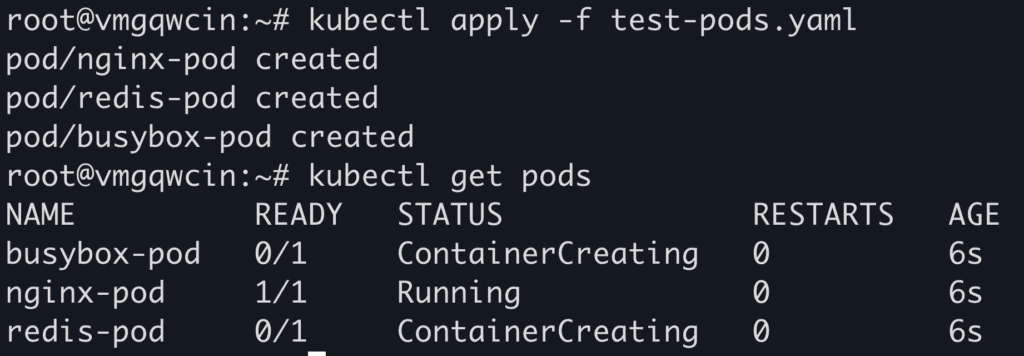
5. Apply the configuration.
kubectl apply -f test-pods.yaml
Output:
Step 11: Run the AI model to Manage Pods
- Finally, let’s start
kubectl-ai with our local Ollama model while enabling tool-use.
kubectl-ai --llm-provider ollama --model gpt-oss:latest --enable-tool-use-shim
Now, in latest versions, after running the above command, you might encounter an error like this:
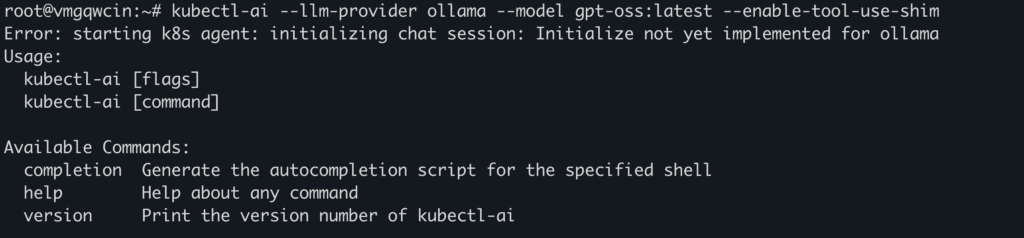
But if you’ve installed v0.0.14, or another stable version, then this command should work fine and start the prompt panel:
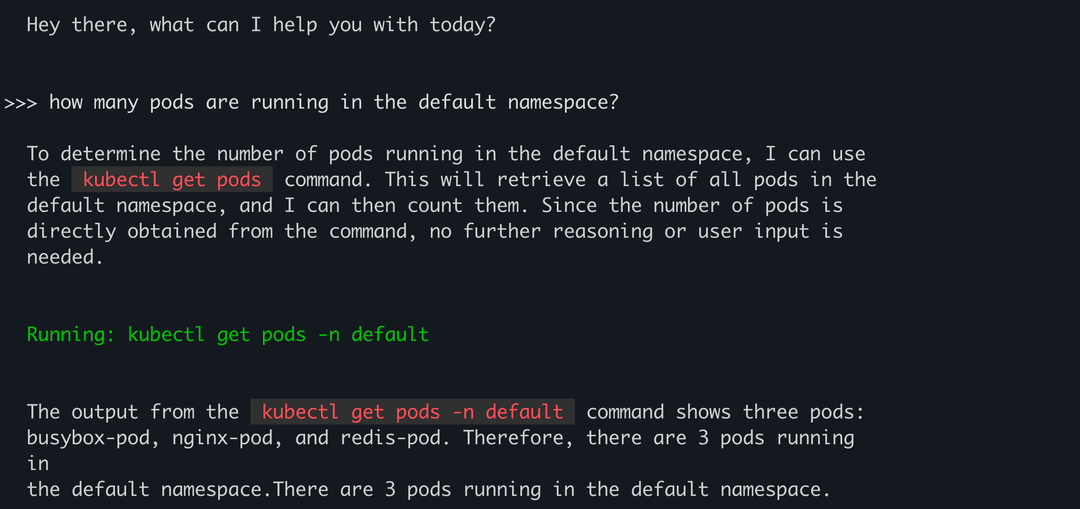
As you can see above, we asked the model about number of pods and it successfully ran the correct command autonomously to find the number as well as the names of the pods and listed it in the response.
You can try running more complex queries in natural language to asses the capabilities of this tool.
Conclusion
kubectl-ai transforms Kubernetes management from a maze of complex commands into a natural, conversational experience powered by LLMs, making cluster operations more intuitive, flexible, and insightful. By supporting multiple AI backends, offering persistent context, and enabling interactive troubleshooting, it redefines how teams interact with their infrastructure. NodeShift extends this advantage by providing a seamless environment to deploy, integrate, and scale such intelligent tooling, ensuring that DevOps teams can not only simplify Kubernetes workflows but also adopt AI-powered operations with reliability and ease.


