Every token you send to an AI model costs money, and when your application scales, those costs can balloon fast. That’s where Token-Oriented Object Notation (TOON) steps in, offering a revolutionary way to save on API expenses without sacrificing data clarity or model accuracy. Designed as a compact, human-readable, and LLM-optimized alternative to JSON, TOON drastically reduces token usage by 30–60% across large structured datasets. It blends the simplicity of CSV, the readability of YAML, and the precision of JSON, creating a format that’s tailor-made for AI inputs. With features like tabular arrays, indentation-based hierarchy, and optional key folding, TOON helps models parse and reason about structured data more efficiently, all while maintaining perfect fidelity to your original dataset. The result? You send less data, get faster responses, and cut your AI inference costs dramatically, all by changing how you represent your data.
In short, TOON is your model’s language-efficient translator, program in JSON, convert to TOON, and instantly watch your LLM costs drop while comprehension rises.
Prerequisites
The minimum system requirements for running this model are:
- CPUs: 4, GPU: 1x RTXA6000
- Storage: 50 GB (preferable)
- RAM: at least 48 GB
Step-by-step process to install and use Toon
For this tutorial, we’ll use a CPU-powered Virtual Machine by NodeShift, which provides high-compute Virtual Machines at a very affordable cost on a scale that meets GDPR, SOC2, and ISO27001 requirements. It also offers an intuitive and user-friendly interface, making it easier for beginners to get started with Cloud deployments. However, feel free to use any cloud provider you choose and follow the same steps for the rest of the tutorial.
Step 1: Setting up a NodeShift Account
Visit app.nodeshift.com and create an account by filling in basic details, or continue signing up with your Google/GitHub account.
If you already have an account, login straight to your dashboard.

Step 2: Create a Compute Node (CPU Virtual Machine)
After accessing your account, you should see a dashboard (see image), now:
- Navigate to the menu on the left side.
- Click on the Compute Nodes option.

- Click on Start to start creating your very first compute node.

These Compute nodes are CPU-powered virtual machines by NodeShift. These nodes are highly customizable and let you control different environmental configurations, such as vCPUs, RAM, and storage, according to your needs.
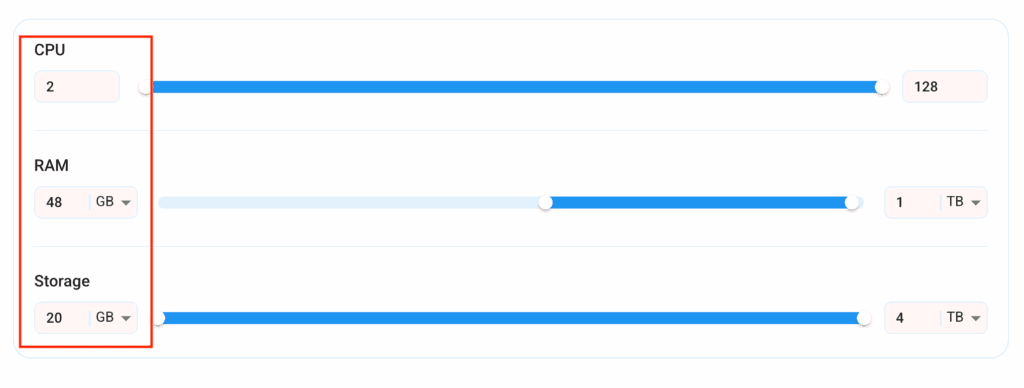
Step 3: Select configuration for VM
- The first option you see is the Reliability dropdown. This option lets you choose the uptime guarantee level you seek for your VM (e.g., 99.9%).

- Next, select a geographical region from the Region dropdown where you want to launch your VM (e.g., United States).

- Most importantly, select the correct specifications for your VM according to your workload requirements by sliding the bars for each option.
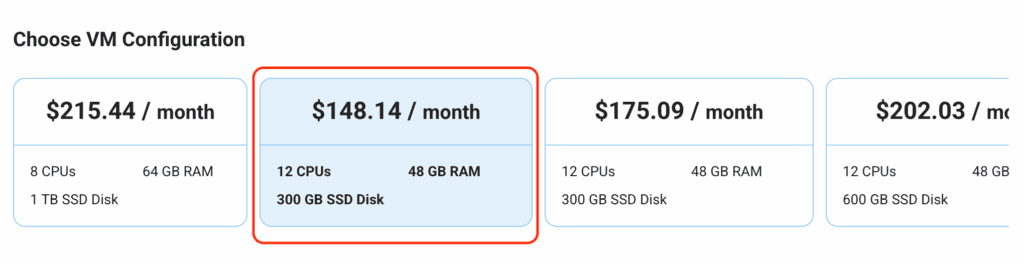
Step 4: Choose VM Configuration and Image
- After selecting your required configuration options, you’ll see the available VMs in your region and as per (or very close to) your configuration. In our case, we’ll choose a ‘4vCPUs/8GB/160GB SSD’ as the closest match to the “Prerequisites”.
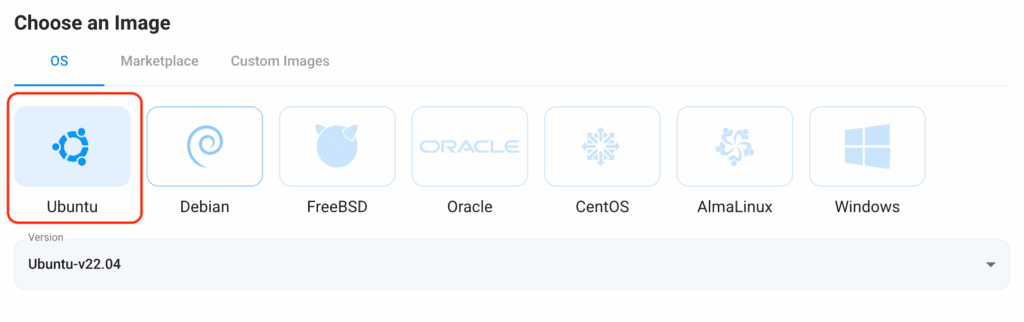
- Next, you’ll need to choose an image for your Virtual Machine. For the scope of this tutorial, we’ll select Ubuntu, as we will install Graylog on the Ubuntu server.
Step 5: Choose the Billing cycle and Authentication Method
- Two billing cycle options are available: Hourly, ideal for short-term usage, offering pay-as-you-go flexibility, and Monthly for long-term projects with a consistent usage rate and potentially lower cost.

- Next, you’ll need to select an authentication method. Two methods are available: Password and SSH Key. We recommend using SSH keys, as they are a more secure option. To create one, head over to our official documentation.

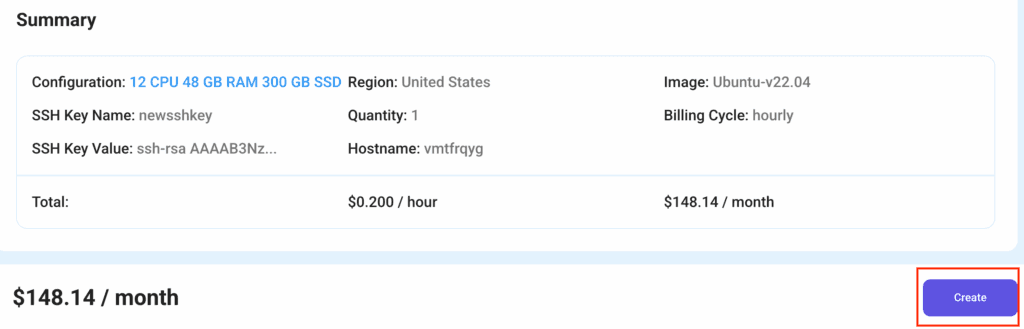
Step 6: Finalize Details and Create Deployment
Finally, you can also add a VPC (Virtual Private Cloud), which provides an isolated section to launch your cloud resources (Virtual machine, storage, etc.) in a secure, private environment. We’re keeping this option as the default for now, but feel free to create a VPC according to your needs.
Also, you can deploy multiple nodes at once using the Quantity option.

That’s it! You are now ready to deploy the node. Finalize the configuration summary; if it looks good, go ahead and click Create to deploy the node.
Step 7: Connect to active Compute Node using SSH
As soon as you create the node, it will be deployed in a few seconds or a minute. Once deployed, you will see a status Running in green, meaning that our Compute node is ready to use!
Once your node shows this status, follow the below steps to connect to the running VM via SSH:
- Open your terminal and run the below SSH command:
(replace root with your username and paste the IP of your VM in place of ip after copying it from the dashboard)
ssh root@ip
2. In some cases, your terminal may take your consent before connecting. Enter ‘yes’.
3. A prompt will request a password. Type the SSH password, and you should be connected.
Output:

Step 8: Setup GPT-OSS with Ollama
- Install Ollama with dependencies.
apt update
apt install pciutils lshw
curl -fsSL https://ollama.com/install.sh | sh
Output:


2. Start Ollama server if it’s already not running by default.
ollama serve
Output:

3. Download gpt-oss using ollama.
ollama run gpt-oss:latest
Output:

Step 9: Install and Setup Toon
- Before installing
toon ensure you’ve the following packages installed in the system:
– node
– npm: see installation guide here
Output:

2. Create a directory for toon-demo and install toon and axios.
npm init -y
npm install @toon-format/toon
npm install axios
Output:

Step 10: Use Toon Data Format for AI requests
- Paste the following demo in
app.js file inside the created directory.
import { encode } from '@toon-format/toon';
import axios from 'axios';

// Sample data - imagine this is from a database
const data = {
  users: [
    { id: 1, name: 'Alice', role: 'admin' },
    { id: 2, name: 'Bob', role: 'user' },
    { id: 3, name: 'Charlie', role: 'moderator' },
    { id: 4, name: 'David', role: 'user' },
    { id: 5, name: 'Eva', role: 'editor' },
    { id: 6, name: 'Frank', role: 'viewer' },
  ]
};

console.log("=== COMPARISON: JSON vs TOON ===\n");

// Show JSON version
console.log("JSON format:");
console.log(JSON.stringify(data, null, 2));
console.log('\n');

// Show TOON version
const toonData = encode(data);
console.log("TOON format:");
console.log(toonData);
console.log('\n---\n');

// Create prompt with TOON data
const prompt = `
Here is user data in TOON format:
${toonData}

Analyze this data and tell me:
1. How many users have the role 'user'?
2. Which user has the role 'admin'?
3. List all unique roles present in the data.
`;

// Send to Ollama
async function queryOllama() {
  try {
    console.log('Sending query to Ollama (gpt-oss model)...\n');

    const response = await axios.post('http://localhost:11434/api/generate', {
      model: 'gpt-oss',
      prompt: prompt,
      stream: false,
    });

    console.log('=== OLLAMA RESPONSE ===');
    console.log(response.data.response);
    console.log('\n=== END ===');
  } catch (error) {
    console.error('Error calling Ollama:', error.message);
    console.error('Make sure Ollama is running: ollama serve');
  }
}

// Run it
queryOllama();
Output:

2. Run the file with node.js to send request to Ollama API running locally with body as Toon data.
node app.js
If you get errors regarding import syntax, just change the type attribute’s value inside package.json to “module“.

Once it runs successfully, it would output the response from the model with comparison of token lengths of both JSON and TOON data format.
Output:


Conclusion
TOON represents a major revolution in how we structure and transmit data to AI models, blending the readability of JSON with the efficiency of token-optimized encoding to dramatically cut costs and speed up inference. By simplifying complex data into a lightweight, model-friendly format, TOON ensures faster, cheaper, and more interpretable AI workflows. NodeShift Cloud complements this innovation by providing the ideal environment to experiment with, deploy, and scale TOON-based applications and models seamlessly, helping developers turn token efficiency into real-world performance and cost advantages in production-grade AI systems.


